Jeff has done a fantastic job of chronicling our genealogy*, uncovering many generations of ancestors for the both of us. Sometimes I'll sit in bed next to him while he searches, reading the screen of his laptop over his shoulder, names like Mattie Floenda, Ernst Heinrich, Martha Jane. Poetic, meaningful names. Each of these people lived long enough to procreate and eventually create us, our family. Think on it too long and it starts to fry my brain.
I've seen all kinds of methods to display the family tree. But none that I've ever wanted to put on the wall.
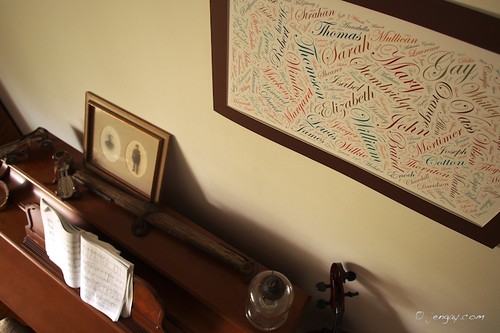
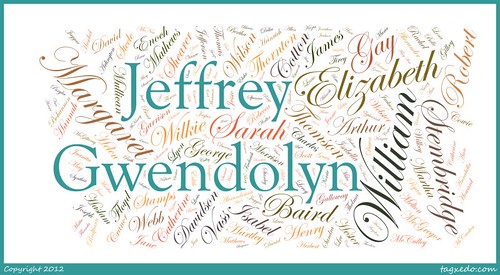
So I made my own. One that focuses on the names, but without all that pesky organization.
Basically, I used a Tag Cloud generator to display the names, which shows the most common as the largest sizes. You'll notice that we have lots of Marys, Williams, Sarahs and Johns.
Shocking, huh.
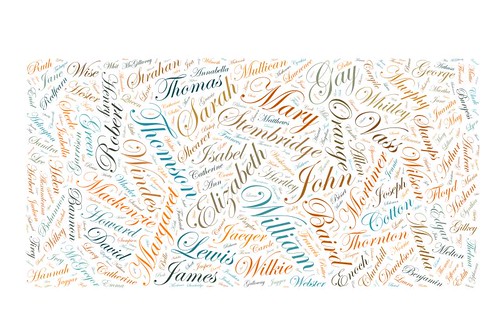
(Here's the original file that I had printed up at Costco.)
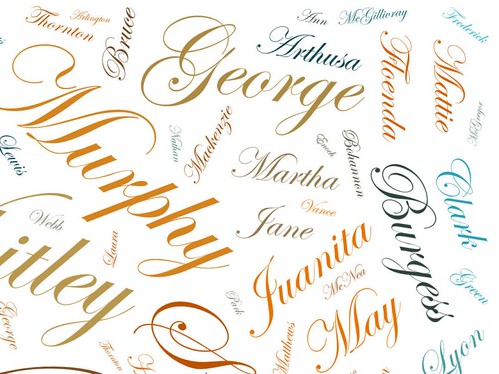
(And this is a close up of the top right corner to give some perspective. Some of those names are pretty tiny, so you'll find people standing right up close to scan them. It usually turns into a strange little game of Eye-Spy.)
Helpful Skills:
If you are already familiar with creating tag clouds, that's about all you need to know. Go forth and make your own.
Basic photo editing knowledge.
Tips: (as usual, I have quite a few, many learned the hard way)
I use Tagxedo because it allows me to control quite a bit of the style and design and also because it can save a pretty huge file, large enough to print, which is kind of the whole point.
When entering data, you can keep two words together by adding a ~ between them (eg: Catherine~Ann). I only did this when I wanted a first and middle name to stay together, not between first and last names. The reason being that I wanted all of the first and last names displayed separately, with their size calculated independently of one another.
I suggest you create a separate text document to save your list of names. Tagxedo doesn't have the ability to save your progress if you want to leave and come back to it (or accidentally click the back button on your browser, heh hem- don't ask me how I know this one). I'd also write down what colors, fonts, etc you like for that same reason.
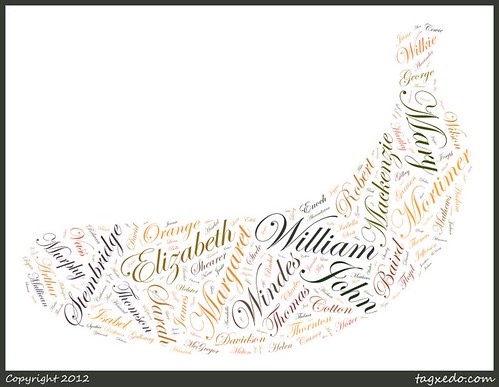
You can use any of the shapes available. Though I chose a simple rectangle that they provided, which I was able to print up to about 15x28 inches. Joey thought the banana gave it a modern flair. Heh.
You can even create your own two-toned picture and upload that for the shape, which is helpful if you'd like create a specific ratio for a standard frame size. In fact, I've made some standard sizes for you to use if you aren't comfortable creating your own.
You can use any fonts that you have already loaded on your computer by clicking Use Local Fonts.
Futz around with the colors and fonts to your heart's content, respinning the effects again and again, but if you see something you like, go ahead and save it to your computer because once you spin it, you won't end up with exactly the same thing again. There is a history button, but it won't hold that for too long. Personally, I had more than a dozen different versions as I worked my way through the changes, making note of the specifics in the titles of each.
You can even change the characteristics of a particular name (or names) to highlight them. These would be great for births, weddings and anniversaries. Basically you type the word (or words) followed by the modifiers. Separate each modifier with a : and don't use any spaces. They can be in any order.
Jeffrey~Gwendolyn [this sticks the words together]
Jeffrey~Gwendolyn:50 [this makes them larger] Try using different numbers to adjust the size.
Jeffrey~Gwendolyn :50: @0 [this makes them larger and at an angle of zero degrees or horizontal]
Jeffrey~Gwendolyn:50:@0:#339999 [this makes them larger, horizontal and turquoise] You can find a list of colors and their codes here.
Jeffrey~Gwendolyn:50:@0:#33999:!Goudy!Old!Style [this makes them larger, horizontal, turquoise and changes their font to Goudy Old Style]
The Theme is where you chose color sets. This is "Red Tops" and my original one was "Sunset on Watert".
If you're curious, the script that I used for most of these is Edwardian Script ITC, which I had local on my computer.
Save the picture by clicking Save/ Share/ Print and under the Image tab, choosing the biggest jpg you can, 16MP.
After I saved the file, I opened it in Photoshop and cropped it down to the appropriate size, with a resolution of 300 pixels/inch. (If you don't have Photoshop, you can find lots of free photo editing tools online.) This will save you much grief when you go to order the print.
When cropping, I also removed the tagxedo.com mark and border. I did this because 1) I was putting this on my wall as art and didn't want a url mucking up the design and 2) I promoted it on facebook and donated to the creator of the software here.
I was able to get this printed up as a poster at Costco for less than ten bucks.
For this one, I cut the matboard to size myself and left it unframed. But you may want to make sure to upload a shape that has a common ratio for frames.
*I would just like to confess that when writing this post, I did not spell this word correctly one time. I kept trying to type "geneology". There, I feel much better.
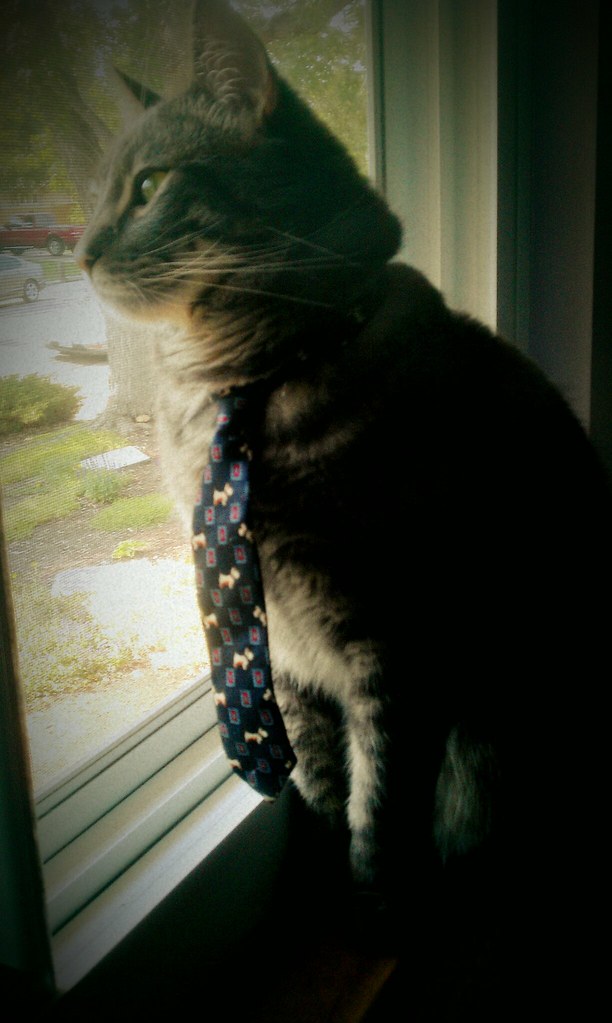
*Photo and caption courtesy of Joey. Well, I guess wardrobe is also Joey's doing. It's not as if Buster gets up in the morning and puts this tie on himself. Though he really doesn't seem to mind it. It's attached with velcro at the back and he'll just wear it around for hours before he somehow pulls it off.
And when he walks into a room while he's wearing it, all nonchalant, it is hilarious. You keep expecting him to put down his briefcase and complain about work. It gives the impression that he hasn't spent the entire day sleeping and licking his ass. Which he totally has.
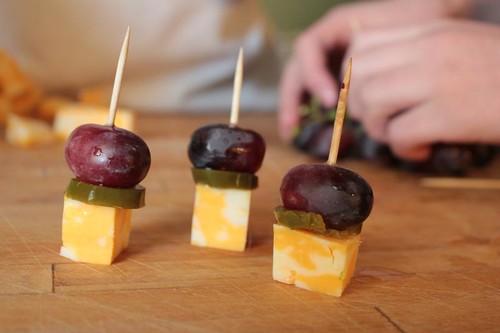
After trying these strange little appetizers at a party, the kids now insist that we have them as an after school snack fairly often. They love them. Which isn't to say that only strange little kids (as ours clearly are) will like them. Most adults do as well. That is despite the fact that the combination seems pretty unappetizing (forgive the pun).
I promise you, these are worth trying.
And my nephew, Kam, was super excited to show the internet how to make them.
So we made this little video. For you. (You'll need colby cheese, pickled jalapenos and red grapes.)
It's slightly more informative than the last tutorial that Kam made three years ago for making frogs out of gumpaste.
I think, at a child's birth, if a mother could ask a fairy godmother to endow it with the most useful gift, that gift should be curiosity.
-Eleanor Roosevelt
Early this spring I discovered a gardening technique that I had never heard of before. I'm sure most of you know about grafting with trees, but did you know you could do it with vegetables too? Tomato grafting allows you to combine the best characteristics of two types of plants into one.
I read about it over at A Way to Garden and I totally geeked out. Two parts of my personality, the avid gardener and the nerdy biologist, were jumping up and down inside my head.
Most gardeners are well aware of the tomato blight, viruses that are destroying tomatoes around the country. And it's also true that heirloom tomatoes, the best tasting kind, in my opinion, are particularly susceptible. Really, that's one of the reasons why they started breeding hybrids, to make them more resistant to these viruses. The problem is that hybrids don't taste as good as the heirlooms.
So what to do?
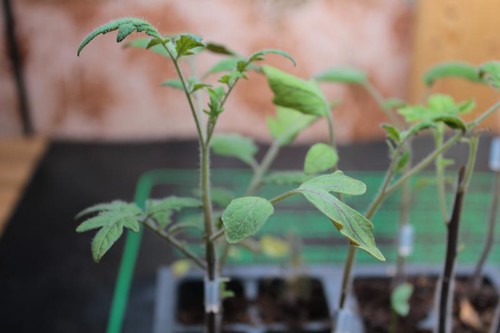
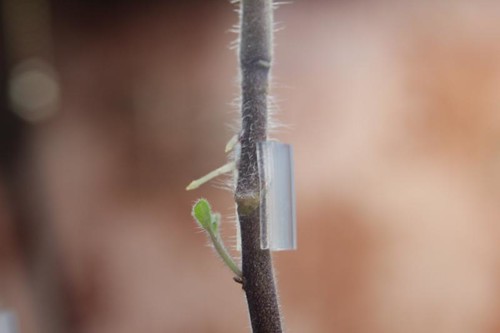
Armed with a razor blade and a silicone clip, you can take two seedlings and combine them into one super tomato plant via razor blade surgery. One seedling should be disease-resistant and prolific. This becomes the rootstock (the bottom half) and controls overall how the plant grows. The other seedling should produce fruit that taste really yummy. This becomes the scion (the top half) and controls what the fruit look and tastes like.
It really is just about that simple. In theory.
I especially like this picture (above) because it shows how the rootstock on the bottom is attempting to grow itself some leaves while the scion on the top is attempting to grow its own set of roots. All of these will need to be pulled off to keep that from happening. If these were allowed to grow, it would ruin all the hard work, producing grodey hybrid fruit and reducing the disease resistance of the plant.
I actually managed to create 6 successfully grafted plants on the first go. I felt a bit like a mad scientist during this entire endeavor and may or may not have had the words, "It's Alive!" go through my mind
every so often.
I started with 12 seeds of Maxifort for the rootstock, which is resistant to F2 (Fusarium Wilt 1 and 2), N (Nematodes), TMV (Tobacco Mosaic Virus), V (Verticillium Wilt), PL (Corky Root Rot) and FOR (Fusarium Crown and Root Rot). I also started 6 each of Brandywine and Ace (These were the heirloom seeds that I already happened to have). With Jeff's help, I grafted 7 plants total. One of which came apart after the first day and started growing quite an impressive set of leaves from the rootstock. (I won't be planting this one.)
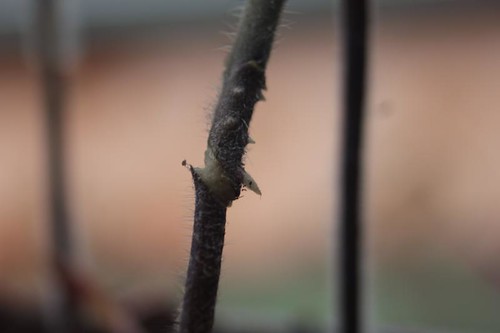
The silicone clip fell off of this guy (below) early on, but the two parts somehow managed to stay close enough together to fuse. It's definitely less pretty than the others that were held closer together, but I still think it's amazing.
I won't go into the specifics right now as I am miles away from being any sort of authority on the subject. Though I do promise to include more info as I figure it out. I basically followed the instructions in this video for the top grafting, not the side grafting that he starts out explaining.
Oh, I almost forgot. I have seen grafted tomato plants for sale at a nursery or two around town. They were running about $12 for a gallon size. So depending on how many you want to grow, this might be a more economical solution for you.
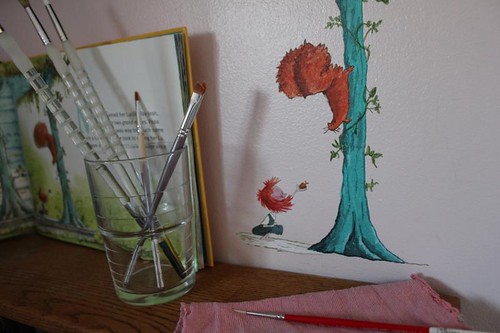
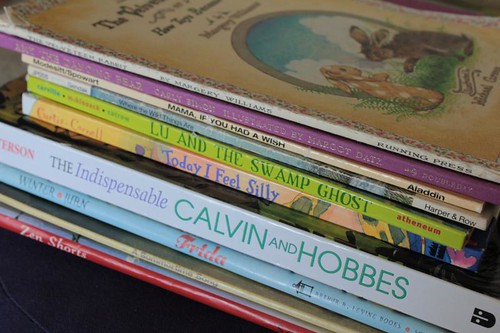
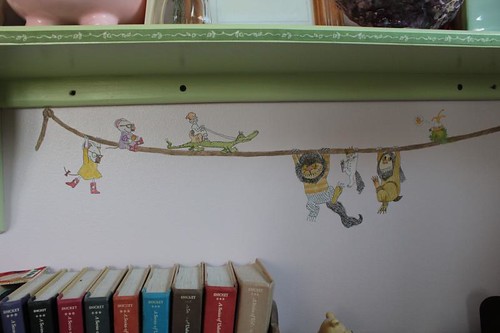
I finished another little painting in Joey's room. This one is from Lu and the Swamp Ghost, written by, strangely enough, James Carville.
I've done quite a few of these over the years. Luckily, Joey's still excited to come home from school and see that I've finished another one.
All of the mini murals I've done come from her favorite storybooks.
I scanned the pictures, played with them in photoshop to show as much of the basic outline as possible (I think I used the stamp effect), and then printed them up on overhead projector sheets. You can cram quite a few of them on each one.
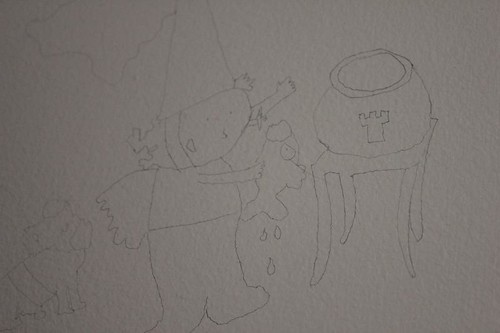
Then I projected them onto the wall and traced them in pencil.
You can barely see the penciled versions unless you're right up close. That way, I can finish them when I have time. Though this technique may have given me way too much time, since I've been working on this project for like ever. And there are still more pencil drawings than finished paintings.
Our favorite part is deciding where to put everybody.
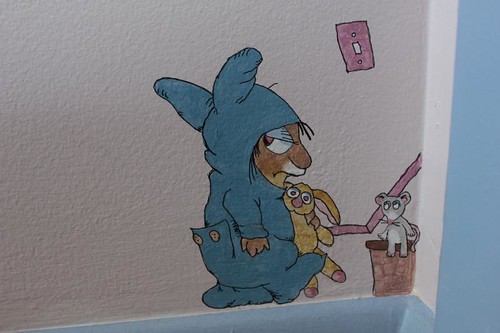
Like this little guy who is in the corner, behind the door.
And this bunch who are all hanging from a long rope I painted in.
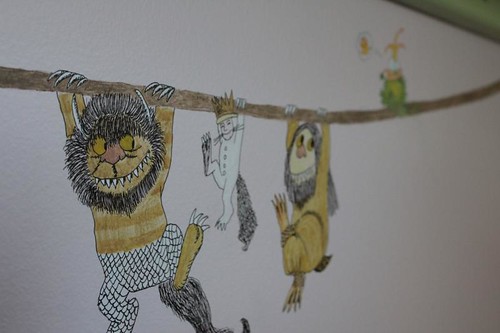
I use plain ol' acrylic craft paints, thinned with water, letting it dry between coats (sometimes speeding things with a blow dryer). This allows me to more easily do shading on the sort of difficult pieces. I traced quite a few of them at the end with a super thin, black marker.
The Wild Things' hair and scales were done mostly with the marker. It gives you a lot more control that way.
I try a lot of things. Sometimes they work, sometimes not. Take knitting as an example. I always say that I like knitting, but honestly, I think I just like the *idea* of knitting.
About Wendy
I'm a mom with 4 kids, only one of which I've grown from scratch. And as for my 3 stepkids, I'm incredibly lucky to have such wonderful people in my life. I've almost always got way too many projects going. But, if you want to know more than that, click here to see 8,452 completely random things about me... give or take.
This site is for entertainment purposes only. Though she has many impressive talents, Wendy is not a professional and nothing on this site should be construed as professional advice. She is simply describing how she takes care of herself and her family. Please do not do anything on this site without first checking in with your physician, trainer, life coach, nutritionist, financial adviser or clergy (and most importantly, with your own sense of what is right for you).